Set up DataHawk MCP
How to connect DataHawk MCP to AI clients like Claude, ChatGPT, Cursor, n8n, Make, and more.
DataHawk MCP works with any AI assistant that supports the Model Context Protocol, from chat tools to code editors to automation platforms.
Not sure which to pick? Most users start with Claude or ChatGPT: They're the fastest to set up (under 2 minutes) and best for ad-hoc questions. Move to a code editor if you're building apps, or n8n / Make if you're scheduling automations.
Before you start
Confirm your DataHawk plan supports MCP
MCP access is enabled by default on active DataHawk workspaces. If you're not sure whether your plan is eligible, ping [email protected].
Get your MCP endpoint URL
https://mcp.datahawk.co/mcpKeep this tab open. You'll paste the URL into your AI client in the next step.
Verify your data sources are connected
MCP only returns data for the marketplaces and accounts you've already connected in DataHawk. Before testing, confirm:
- Your Amazon Seller Central or Vendor Central accounts are linked and syncing
- Your Amazon Advertising account is linked
- (Optional) DSP is linked if you want DSP metrics in MCP responses
If anything shows a red "disconnected" state, fix it before connecting your AI; MCP will return empty results for missing sources.
Set up
Chat with your data (LLMs)
Check out the official Claude custom connector guide
If you have a company team plan, your Claude admin will have to add the connector
Open Claude → Customize → Connectors

Click Add custom connector

Paste your DataHawk MCP endpoint and Name it DataHawk:
https://mcp.datahawk.co/mcp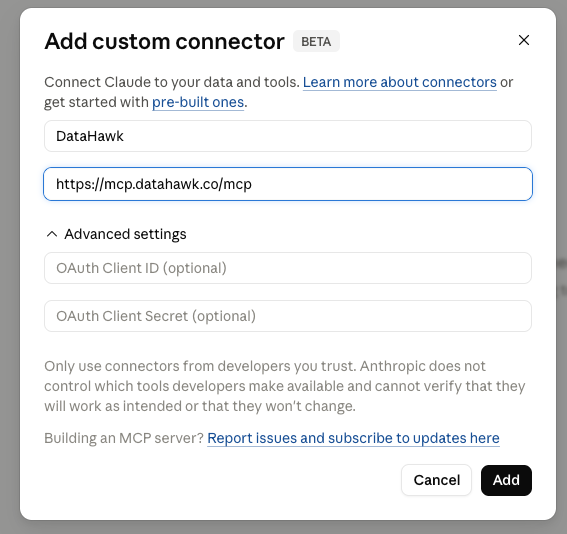
Click Connect
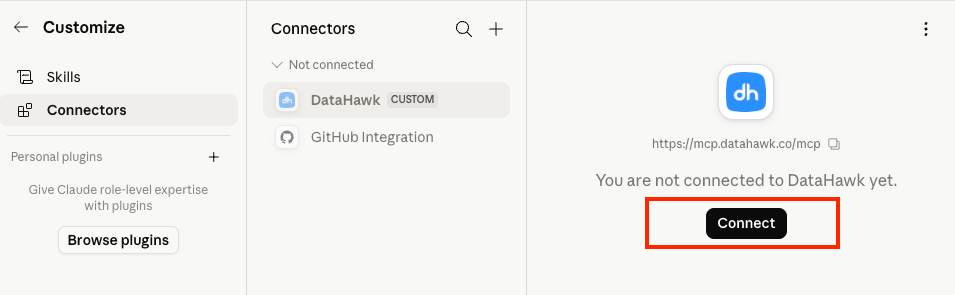
You'll be redirected to DataHawk to authorize the connection. Sign in with your DataHawk account
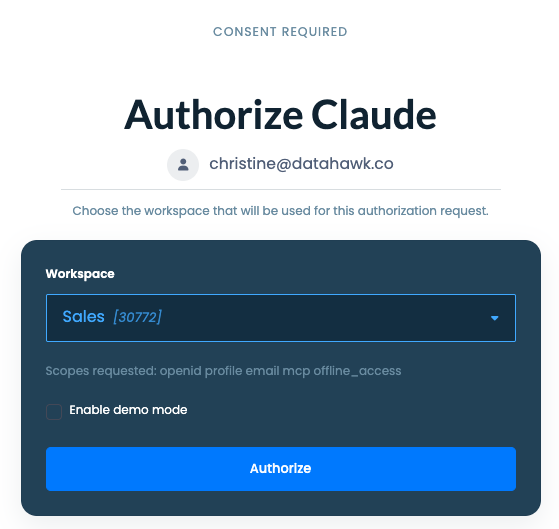
Approve the permissions screen
You should now see DataHawk in your list of connected tools with a green status.
Check out the official ChatGPT Apps guide
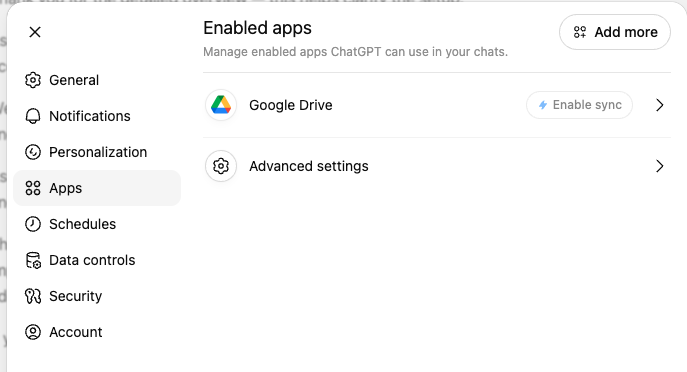
In ChatGPT, click your profile → Settings → Apps
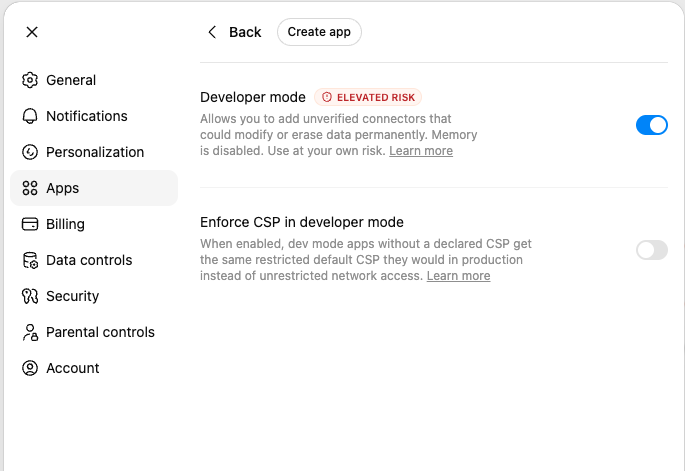
Click Advanced settings → Custom MCP server
Activate Developer mode
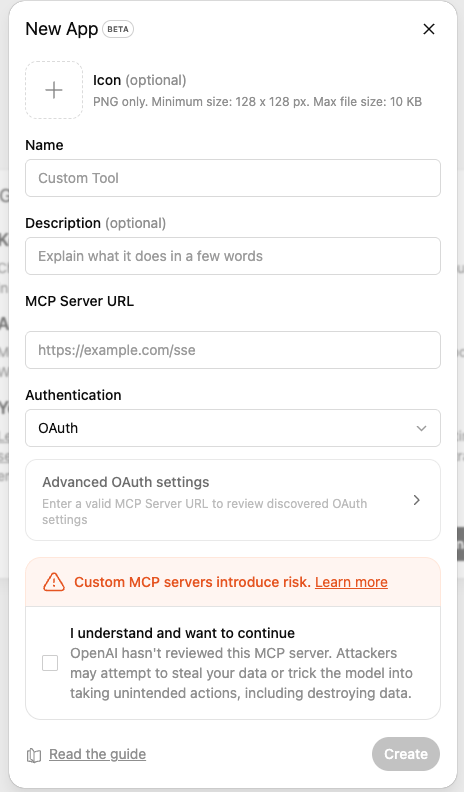
Then click on Create app
Fill all the required information:
-
Name: DataHawk
-
Paste your DataHawk MCP endpoint to MCP Server URL:
https://mcp.datahawk.co/mcp
Tick “I understand and want to continue”
Create
You will see the enabled apps. And you are ready to start!
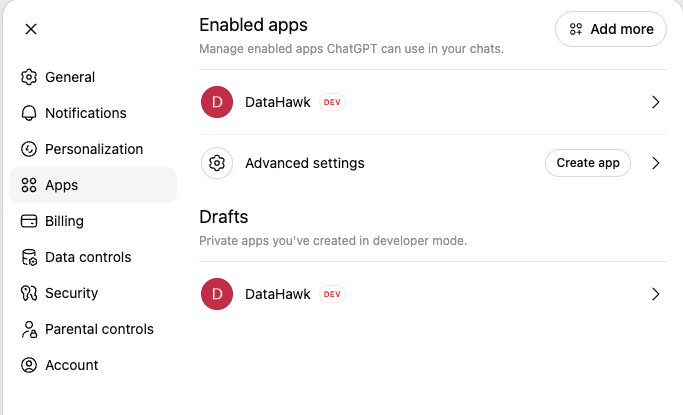
You should now see DataHawk in your list of connected tools with a green status.
Build with your data (code editors & AI App builders)
We invite you to go to the official guide of Winsurf on MCP
Here is out MCP endpoint
https://mcp.datahawk.co/mcpWe invite you to go to the official guide of Lovable on MCP
Here is out MCP endpoint
https://mcp.datahawk.co/mcpWe invite you to go to the official guide of Replit on MCP
Here is out MCP endpoint
https://mcp.datahawk.co/mcpAutomate with your data (workflows & schedules)
We invite you to go to the official guide of n8n on MCP
Here is out MCP endpoint
https://mcp.datahawk.co/mcpWe invite you to go to the official guide of Make on MCP
Here is out MCP endpoint
https://mcp.datahawk.co/mcpOnce you're connected
Introduction
Connect any AI assistant, Claude, ChatGPT, Cursor, n8n, Make, directly to your Amazon data using the Model Context Protocol.
How to write effective MCP prompts
How to phrase DataHawk MCP prompts so you get the right answer the first time; anatomy, domain vocabulary, patterns, and iteration tips.